
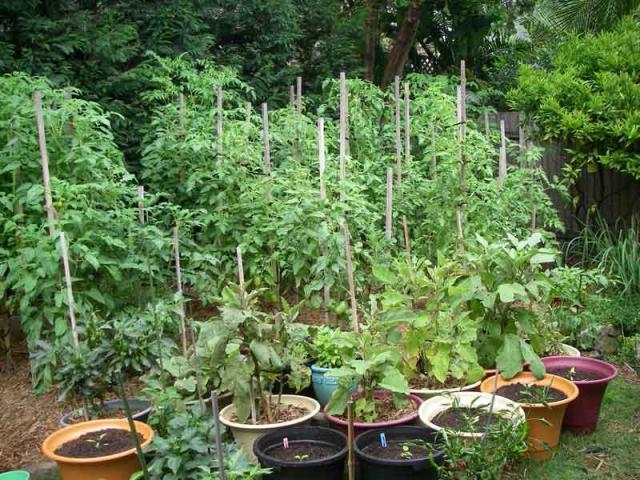
There are any number of ways to support tomato plants. Some work better than others, depending on the size of the plants.
While we do grow a few dwarf and determinate tomato varieties, the vast majority of the tomato varieties we grow are indeterminate, producing 5-10′ tall plants. The cone-shaped tomato cages found stacked floor to ceiling at big box retail stores are fine for the smaller varieties, but absolutely will not support our larger plants.
Here, we present the methods we prefer or recommend for adequately supporting indeterminate or semi-determinate varieties. We’ll discuss the advantages and disadvantages of each as well:
Texas Tomato Cages™
These premium cages are made of galvanized metal (little or no rust), foldable for easy storage, and solidly constructed. The cages come in two sections, a bottom and a top. They are also expensive (nearly $24 per cage including shipping and tax), but will last a lifetime if properly taken care of.
The standard/large cage is 24″ in diameter and 6′ tall. We also occasionally like to use the 18″ wide cages for containers or some of the more droopy foliaged heart/paste varieties like Prue or Wes. Really, the only disadvantage to these is the cost — in our opinion these are by far the best ready-to-use cages on the market. Visit Texas Tomato Cages website for more information.
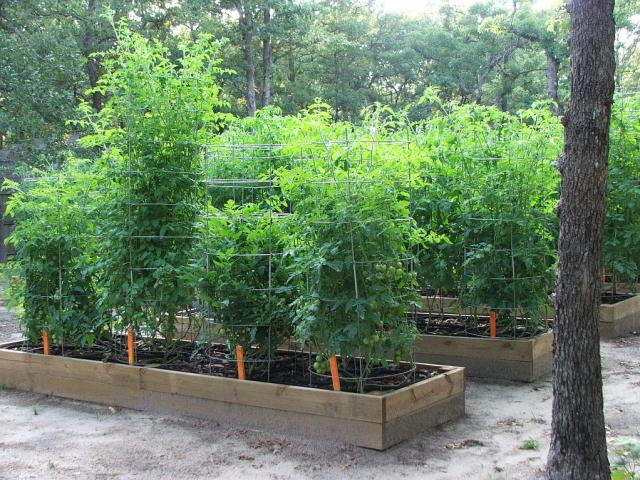
Texas Tomato Cages in Suze’s 2007 garden
Concrete Reinforcement Wire (CRW) Cages
These are also a great way to support plants. However, you will need to make them yourself (use caution and wear a long sleeved shirt, gloves, and eye protection when cutting the wire) and they are not foldable, so will take up a fair amount of room in your yard in the off-season, especially if you grow a lot of plants.
They will last many years (we have heard of folks who still use CRW cages they made 20 years ago), although they do rust. One way to somewhat mitigate the storage space they will take up is to make some of the cages a slightly smaller diameter, so that they can be stored inside of the larger ones.
It is generally recommended to make a 24″ diameter cage, but some prefer them a bit smaller. There is no need to cut off the bottom so that the cages can be stuck into the ground a few inches, as if will not make the cages stable enough for our occasional high winds, and you will lose a bit of cage height by doing so. Stabilize the cages using lengths of rebar driven at least a foot into the ground and secured to the cages with wire or zip ties.
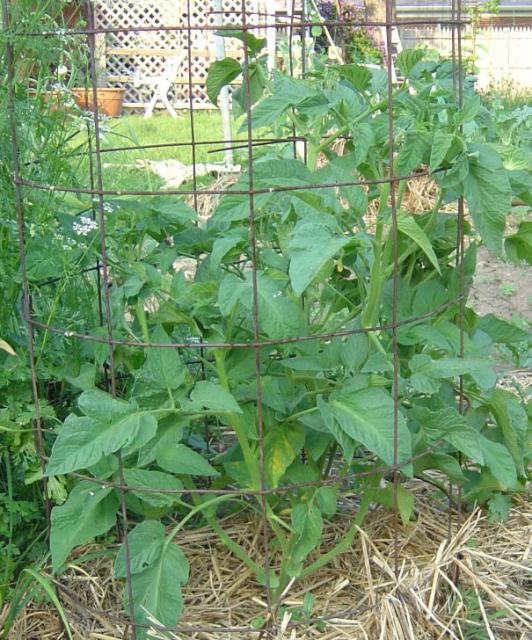
Earl’s Faux and Aunt Gertie’s Gold in Concrete Reinforcing Wire cages by Earl Cadenhead in Columbus, OH
Galvanized “C” Cages
Galvanized fence is cheap and comes in 50, 100, and 150 foot rolls up to 5 feet tall. The main benefit of galvanized fence is that it is lightweight, nearly as strong as the heavier Concrete Reinforcing Wire (as described above) and does not rust. The drawback, which has kept some people from seriously considering them for cages, is that the fence holes are a mere 2″ x 4″ — too small to accommodate any but the smallest of hands.
The solution Morgan found is to prop the ends of the cage open with lengths of heavy wire. This gap allows tending to the plants and harvesting. Cages should be zip-tied together once the plants start getting taller. Another solution (pictured below) is to add T-posts to your garden bed and attach the cage ends to them. Either way, at ~$80 for 20 cages and a couple hours of work, it is one of the cheapest cage solutions we’ve seen.
Tip: Galvanized fence comes tightly wound. To unspool it, ask a friend or use a couple of bricks to secure the roll while you unroll and flatten sections of it by walking on it. It will still have enough “spring” to form a circle once released.
Hint: Use heavy wire snips to cut the fence. A 2 foot wide cage would require just over 6 feet of material. But since we are leaving an approximate 1 foot gap in each cage, then we should cut lengths of fence approximately 5 feet by 5 feet.


Morgan’s Galvanized “C” Cages, anchored together using zip ties
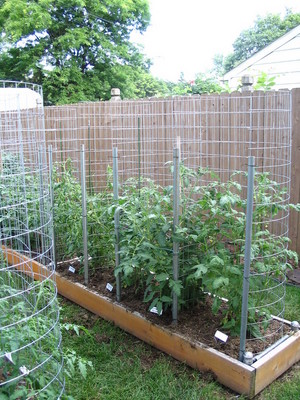
Photo courtesy of Bully in Michigan, “C” Cages anchored using posts
Florida weave
Requiring less maintenance than staking and able to support more plants at a lower cost, Florida Weave is a process of “weaving” tomato plants using heavy garden twine between stakes (typically placed between every other plant) to support and contain the plants.
There is still a bit more work involved when compared to just caging. Twine will need to be added periodically to support the plants as they grow, also, the plants will need to be trained into the weave. For instructions, see How Do I Use Florida Weave?
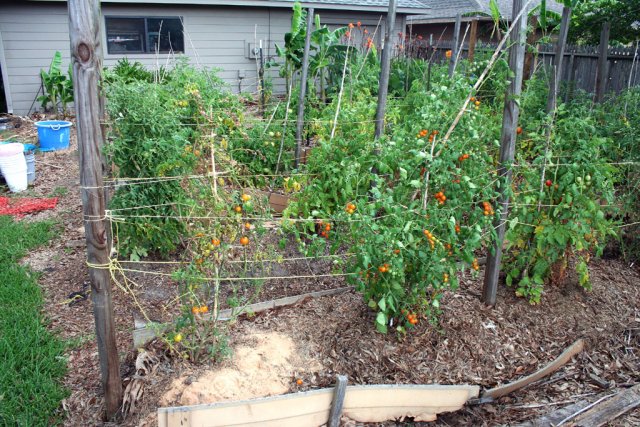
Florida Weave courtesy of Michael Gunn in Pasadena, Texas
PVC Cages
PVC cages are made from lengths of PVC and connectors. These are comparable in cost to Texas cages, plus there is some work and time involved in making them. In addition, the components have to be reassembled each year, if one is disassembling the cages at the end of the growing season. However, they are very sturdy and are presented as one of many support alternatives. See Tom Matkey’s PVC Tomato Cages for pictures and instructions.
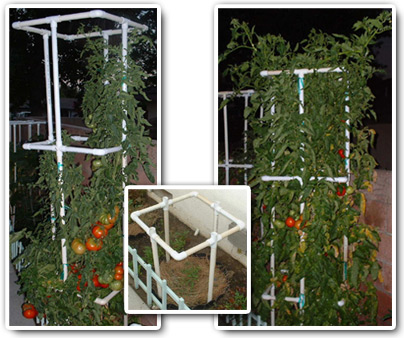
PVC Cages courtesy of Tom Matkey
Staking
Staking is a frequently recommended means of supporting tomato plants, however, it requires a fair amount of maintenance for indeterminate tomato varieties. Six to eight foot stakes driven at least a foot into the ground are recommended.
You will need to periodically tie up the plants to the stakes using garden twine or the stretchable green garden tape – really, anything you have on hand that will not cut into the plants can be used, some even cut up old worn out t-shirts into strips and use that as ties. Wooden stakes can be used, but since termites are so prevalent in our area, they may not last long unless they are treated wood. We generally prefer the 8ft green plastic coated metal stakes which can be found at many large home improvement stores. Metal T-posts can also be used as well if you can find ones that are at least 6′ tall for indeterminates, because you will lose 1′ driving them in to make them stable.
Staked tomatoes courtesy of “Grub” Lockwood in Australia
Cattle Panels
Neither one of us has personally used cattle panels to support plants, but thought it might be worthy of mention in order to provide another good alternative to support indeterminate plants. We have seen instances where tomato gardeners made a huge garden arch with a panel and planted their tomato plants on the outside. We’ve also seen instances where folks put long lengths of panel in their beds or rows and then shored the panels up with posts every few feet. If using this method, you’ll need to periodically tie up your plants to the panels and/or train them into the panels.
Sprawling
You may be tempted to allow your tomato plants to sprawl along the ground, as they do in their native environment. However, we have found that this does not work particularly well in our humid South East Texas climate.
Disease pressure here is high due to our heat, humidity, and occasional torrential spring and early summer rains. Plants and fruits will be more susceptible to Early Blight, Anthracose, and other assorted rots and fungal diseases. If you intend to sprawl, be prepared to grow extra for the slugs, birds, and other critters. Plant spacing would need to be quite a bit more generous than with caged or staked plants, allowing at least 5 feet between rows and 4 feet between plants within a row. A heavy layer of mulch would be a must.